O-6-134 Hire an External Candidate in Dayforce
👤 Role
Hiring Manager or Designee
⚠️ Must have Manager Role in Dayforce
🎯 Purpose
After an external candidate has accepted an offer of employment, passed the background study, and arrived onsite at the office location for their first day of employee orientation, the Hiring Manager must move them from a candidate status to an employee status in Dayforce by marking them as Hired.
Hiring the candidate in Dayforce also creates the new employee record in Dayforce and includes setup of fields which are critical to the new employee’s setup and permissions. Because of this, it is important to avoid creating the employee record prematurely; do not complete this process until the candidate has arrived for their scheduled onsite orientation.
🔄 Process
- Before proceeding, ensure the candidate has completed ALL of the following:
-
Accepted an Offer Letter
🔗 Reference O-6-131 Send Offer Letter to Candidate
-
Pre-Hire Questionnaire
🔗 Reference O-6-132 Send Pre-Hire Questionnaire to Candidate
-
Received a determination of “Eligible” from completed NetStudy 2.0 Background Study
🔗 Reference O-4-123 NetStudy 2.0 - Complete Background Study
-
- Ensure the candidate has arrived onsite at the office location for orientation, which is their first day of work. Do not proceed if the candidate has not arrived for orientation.
- Logged in under the manager role, navigate to the requisition and view the list of candidates. Select the checkbox beside the candidate being hired. The row will be highlighted in grey.
-
In the row of buttons above the candidate list, select Hire to hire the selected employee.
- A pop-up window will open and display the New Hire Form. Data from the completed Pre-Hire Questionnaire and candidate profile will pull into various fields throughout the New Hire Form.
- Complete fields in the Pay Group section:
-
Pay Group: select either Hourly Bi-Weekly or Salary Bi-Weekly as applicable.
🔗 Reference the Appendix at the end of this document for Pay Group information.
Complete fields in the Personal Details section as directed below.
⚠️ Cross-compare the candidate's personal details with copies of the physical documentation they provided at the beginning of their orientation when completing the I-9 Form, as well as their Minnesota driver's license. Documentation typically includes a social security card and the required Minnesota driver's license.

- Employee Number: Create and enter an employee number using their birthdate and the last four digits of their social security number following the format of MMDDYYSSSS.
- First Name: This field will populate from the Pre-Hire Questionnaire.
-
Middle Name: This field must be completed for payroll reasons.
💡 Enter their middle initial, referencing information from their NetStudy 2.0 Background Study, if needed.
- Last Name: This field will populate from the Pre-Hire Questionnaire.
- Preferred First Name: Add only if applicable. Their listed first name must be their legal first name.
- Gender: This field will populate from the Pre-Hire Questionnaire.
- Marital Status: This is optional; omit this field.
- SSN: This field will populate from the Pre-Hire Questionnaire.
- SSN Expiry Date: Not required; omit this field.
- Birth Date: This field will populate from the Pre-Hire Questionnaire.
- Citizenship: Not required; omit this field.
- Language: This field will populate with English (US), the only selectable option.
- Hire Date: Enter the date of the candidate’s expected first day of work.
- Onboarding Policy: Select “Onboarding Policy”.
- Onboarding Date: Enter today’s date.
-
-
Complete fields in the Address section as directed below:
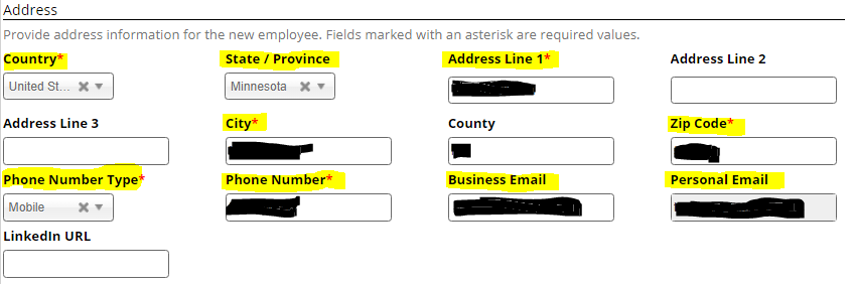
- Country: This will default to the “United States of America”.
- State/Province: This field will populate from the Pre-Hire Questionnaire.
- Address Line 1: This field will populate from the Pre-Hire Questionnaire.
- Address Line 2: If used, this field will populate from the Pre-Hire Questionnaire. If this field is blank, leave it blank.
- Address Line 3: If used, this field will populate from the Pre-Hire Questionnaire. If this field is blank, leave it blank.
- City: This field will populate from the Pre-Hire Questionnaire.
- County: This field is optional and can be left blank.
- Zip Code: This field will populate from the Pre-Hire Questionnaire.
- Phone Number Type: This field will populate from the Candidate Profile.
- Phone Number: This field will populate from the Candidate Profile.
- Business Email: If the employee will be given an Adara business email, enter the company email address assigned to them in the “Username and Password Request Form”.
- Personal Email: This field will populate from the Candidate Profile.
- LinkedIn URL: Leave this field blank.
-
Review fields in the Location and Job Assignment section; ensure no changes are needed.

- Location: This field will populate as selected in the requisition with the specific office location and department.
- Job Assignment: This field will populate from the requisition setup.
- Virtual: Leave this checkbox un-checked.
-
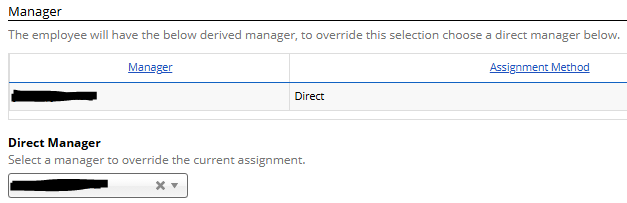
Under the Manager section, ensure the selected manager is correct. If not, change the manager under the “Direct Manager” dropdown.
-
Complete fields within the Status and Compensation section as directed below; ensure correct payroll details are entered.
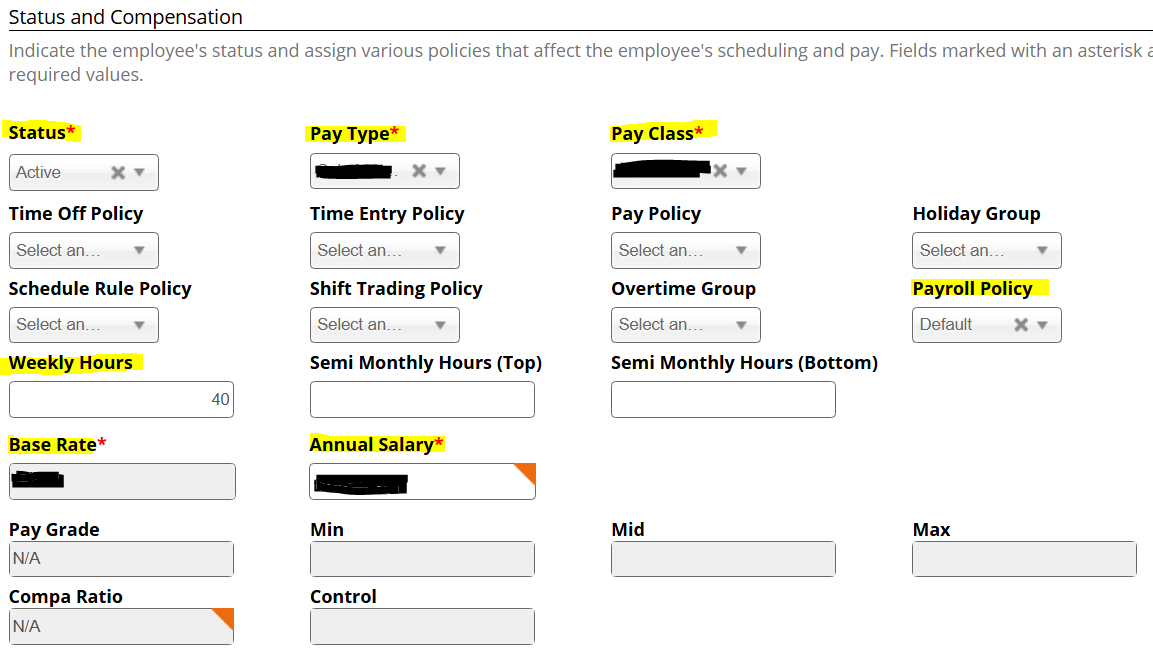
- Status: Select Active.
-
Pay Type: This field will populate from the requisition; however, ensure this is accurate,
🔗 Reference the Appendix at the end of this document for Pay Type information
-
Pay Class: This field will populate from the requisition; however, ensure this is accurate.
🔗 Reference the Appendix at the end of this document for Pay Class information
-
Time Off Policy:
🔗 Reference the Appendix at the end of this document for Time Off policies
- Time Entry Policy: Select the appropriate option related to the employee’s pay type and class.
- Pay Policy: Select the appropriate option related to the employee’s pay type and class.
- Holiday Group: Select the appropriate option related to the employee’s pay type and class.
- Schedule Rule Policy: Leave this field empty.
- Shift Trading Policy: Leave this field empty.
- Overtime Group: Select the appropriate option related to the employee’s pay type and class.
- Payroll Policy: Select the appropriate option related to the employee’s pay type and class.
- Weekly Hours: Enter “40” in this field, unless in an unusual circumstance a position with a different consistent weekly total (e.g. 35 hours) has been arranged.
-
Average Daily Hours: Enter 8.
📌 The Average Daily Hours field drives accurate holiday pay.
- Semi Monthly Hours (Top): Leave this field empty.
- Semi Monthly Hours (Bottom): Leave this field empty.
-
Base Rate: Ensure the generated hourly rate is accurate as listed in the offer letter accepted by the candidate.
🔗 Reference the offer letter found in the Offer Letter Approved notification in Dayforce messages, if needed.
-
Annual Salary: Ensure the generated annual salary is accurate as listed in the offer letter accepted by the candidate.
🔗 Reference the offer letter found in the Offer Letter Approved notification in Dayforce messages, if needed.
- Pay Grade: Leave this field as N/A.
- Min: Leave this field empty.
- Mid: Leave this field empty.
- Max: Leave this field empty.
- Compa Ratio: Leave this field empty.
- Control: Leave this field empty.
-
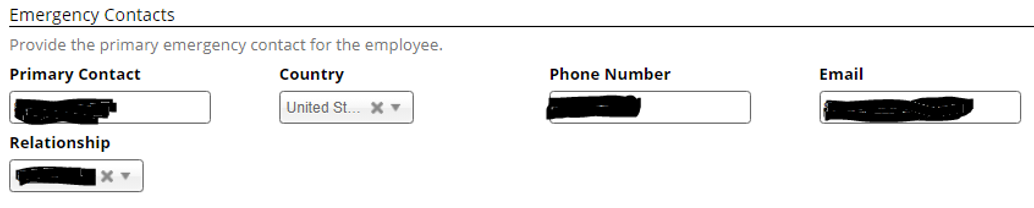
The Emergency Contacts section will have populated with information submitted by the candidate as prompted in the Pre-Hire Questionnaire. Unless information for a Primary Contact and Phone Number is missing, no further action is needed by the Hiring Manager in this section.
-
Complete fields within the User Credentials section as directed below:
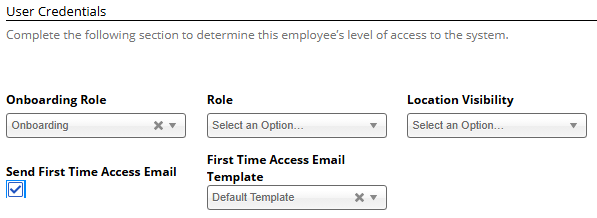
- Onboarding Role: Select “Onboarding”.
-
Role: Select the appropriate Employee Role, either Employee (Automatic) or Employee (Time Clock).
📌 If the employee will be in a managerial role, that second Role will be added later by Payroll and is not needed initially.
🔗 Reference the Appendix at the end of this document for more information about Roles
- Location Visibility: Leave blank, no selection needed.
- Send First Time Access Email: Check this box.
- First Time Access Email Template: Select “Default Template”.
-
If the employee is an RN or LPN, add a comment with their license information.
EXAMPLE
“RN License #12345678, expires 03/2026”

-
After all sections above are complete, select Submit to complete the New Hire Form.

Completing this submission results in immediately sending a notification to the payroll manager, human resources, recruiting, the hiring manager, and the submitter's manager.
-
At this point, the individual moves from applicant status into employee status and will be able to proceed with Onboarding Forms, which must be completed with the first 3 days of work.
Within Recruiting in Dayforce, the candidate status will change automatically to Hired upon submission of the New Hire Form, and the requisition will automatically be marked as Filled if the number of openings was set as “1”.


📎 Appendix
This table gives a breakdown of the correct selection for various fields within this process based on an employee’s payroll setup, which is dependent on the type of employment offered.
|
EMPLOYEE TYPE ➡️ ⬇️ FIELD NAME |
Salaried Exempt: Field & Office |
Salaried Non-Exempt: Field & Office |
Hourly/Per-Visit: Field & Office |
|---|---|---|---|
|
Pay Group |
Salary Bi-Weekly |
Salary Bi-Weekly |
Hourly Bi-Weekly |
|
Pay Type |
Salaried Exempt |
Salaried Non-Exempt |
Hourly |
|
Pay Class |
Full Time |
Full Time |
Part Time |
|
Time Off Policy |
Salaried Exempt |
Salaried Non-Exempt |
Hourly |
|
Base Rate |
Hourly rate |
Hourly rate |
Hourly rate |
|
Annual Salary |
Total annual pay |
Total annual pay |
N/A Value may populate from hourly rate |
|
Role |
Employee (Automatic) |
Employee (Time Clock) |
Employee (Time Clock) |
📅 Effective: 03.28.2025 | 🛠️ Revised: 04.29.2026 | ✅ Approved: JFJ