
O-7-160 Mobile Forms Review and Linking
👤 RESPONSIBLE POSITION
Business Manager (or designee)
and
Administrative Assistant
🎯 PURPOSE
This process outlines the steps needed for the back office to review, mail, and attach mobile forms submitted by clinicians within Mosai Mobile.
🔄 PROCESS
|
Table of Contents |
Responsible Position |
| Part One: Review and Correct Documentation |
Business Manager / Designee |
|
Administrative Assistant |
Part One: Review and Correct Documentation
Steps 1-10 are to be completed by the Business Manager or designee.
-
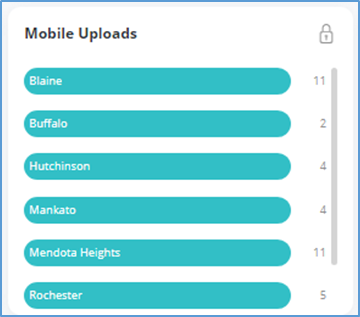
After logging into Mosai on a web browser, locate the Mobile Uploads card on the Mosai Dashboard. Select your branch’s mobile forms bucket. This will navigate you to the shared folder containing mobile forms which clinicians have uploaded from their tablets to the office via Mosai.
-
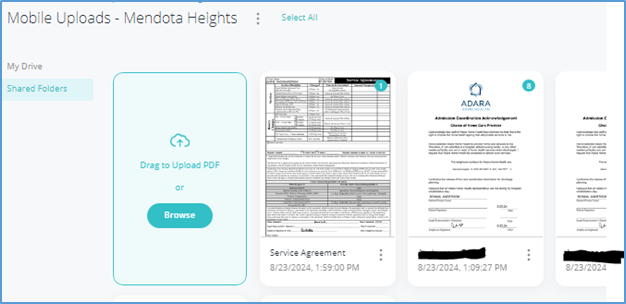
Within the Mobile Uploads shared folder for your branch, previews of mobile forms uploaded will display. There are multiple types of forms which clinicians may complete and upload.
-
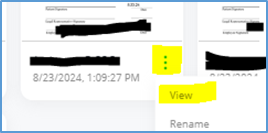
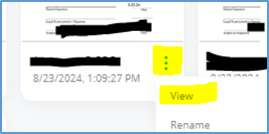
View the document by selecting the 3-dot icon on the lower right of the document preview pane and clicking View.
- Dependent on whether the document is a SOC Packet, complete either of the following:
- Option A: If the document is a Start of Care Admission packet, complete process O-7-161 Start of Care Packet Review, then proceed with following steps of this process.
- Option B: If the document is not a Start of Care Admission packet:
- Scroll through the document and follow up on any entries that seem out of place. If any questions arise, reach out to the clinician for clarification and/or utilize branch or corporate resources to resolve the question.
- If the form contains signature fields, confirm that the document contains a signature and date both from the clinician and from the client or legal representative.
If both the client and legal representative fields are unsigned, locate the POA/LEGAL REPRESENTATIVE coordination note in the client’s chart to identify if there is a POA/Legal Representative who should be signing the document.
If so, follow part three of O-14-216 Process POA/LEGAL REPRESENTATIVE Note to send the paperwork to medical records for electronic signature. (When following those steps, instead of selecting SOC Packet as the document type, select the type of document you need sent for signature.)
- If the document is a Service Agreement, verify that payer(s) listed are current active payer source(s) listed in HCHB for that client.
-
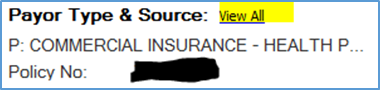
To identify the payer in HCHB, navigate to the patient information via Clinical Input, open the Patient Snapshot, and click View All beside Payor Type and Source.
-
-
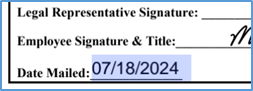
If the document is a Service Agreement, fill in the “date mailed” on the lower left of the page.
-
Click the Save icon toward the upper right.

-
Exit viewing the document by clicking the ‘X’ icon in the upper right corner.
- Move the document to the branch Administrative Assistant shared folder in Mosai by following these steps below:
-
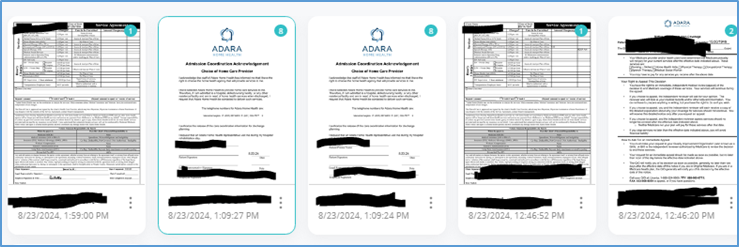
Select the document by clicking the preview pane, and a blue line will outline the document showing it has been selected. In the example below, the document second from the left has been selected.
-
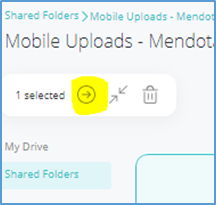
In the upper left, several new buttons will appear. Select this highlighted icon to move the document.
-
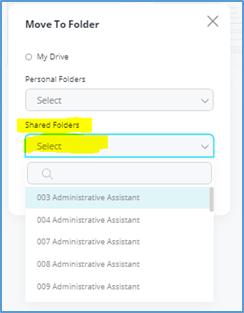
A pop-up will open. From the dropdown under Shared Folders, select the Administrative Assistant folder specific to your branch.
-
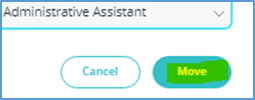
Select Move. The document will move to the Administrative Assistant shared folder immediately.
-
Remaining steps in the process will be completed by the branch Administrative Assistant.
Part Two: Mail and Attach Documentation
Steps 10-end are to be completed by the Administrative Assistant.
-
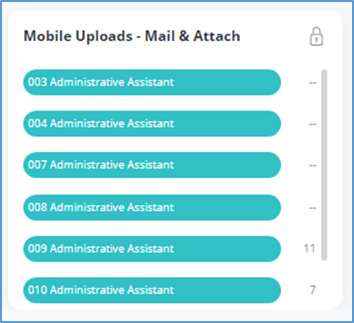
After logging into Mosai on a web browser, locate the Mobile Uploads - Mail & Attach card on the Mosai Dashboard and select your branch’s mobile forms bucket. This will navigate you to the shared folder containing mobile forms which clinicians have uploaded from their tablets to the office via Mosai. The branch Business Manager has reviewed these forms and determined they are ready to be mailed (if applicable) and attached to the client’s chart in Home Care Home Base (HCHB).
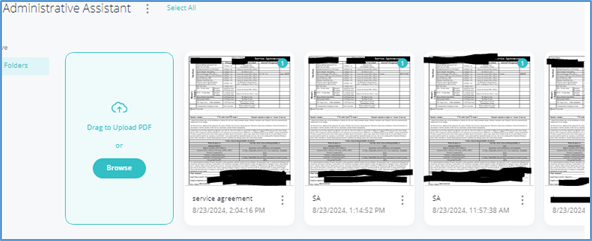
- Within the Mobile Uploads shared folder for your branch, previews of mobile forms uploaded will display. There are multiple types of forms which clinicians may complete and upload.
-
View a document by selecting the 3-dot icon on the lower right of the document preview pane and clicking View.
- Determine if the document must be mailed to the client.
The following forms must have a copy mailed to the client:
- Admission Coordination Acknowledgement
- Service Agreement
- Rights/Responsibilities/Consent (4 pages)
- Emergency Plan/Responsible Party
- Advance Beneficiary Notice of Non-Coverage (ABN)
The following forms do not need to be mailed; the clinician will have left a paper copy with the client in their home.
- Home Health Change of Care Notice (HHCCN)
- Notice of Medicare Non-Coverage (48hr Notice- NOMNC)
- Detailed Explanation of Non-Coverage
- If the document must be mailed to a client, complete the following steps. If the document does not need to be mailed, omit this step and continue to step 15.
- If the document is a SOC Packet (8 pages long) scroll down to page 8 to view the Advance Beneficiary Notice of Non-Coverage (ABN). Do not delete the 8th page even if marked as N/A.
-
Select the print icon in the upper right.

-
Select your branch’s printer from the Destination dropdown.
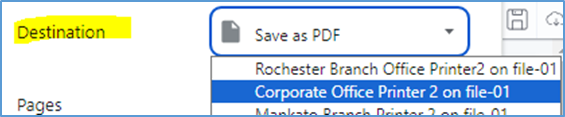
- The Pages field will auto-populate with All. Leave this field as All unless the document was a SOC Packet and 8th page was filled out as N/A. In that case, omit page 8 by selecting Custom and entering pages 1-7.
-
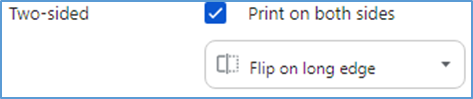
Under More Settings ensure Print on both sides is selected.
-
Select Print.

- Mail the printed document(s) to the client. If other documents are awaiting mailing to the same client, these may be combined in the same envelope.
- Prepare the document to be attached to HCHB by entering the following data in Mosai.
-
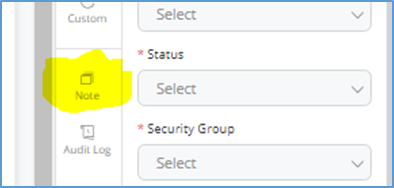
While viewing the document, select Note in the sidebar.
-
Select New.

-
In the note field, include the type of document and the date the document was signed and then click Add Note. This text will populate to the comments field in HCHB.
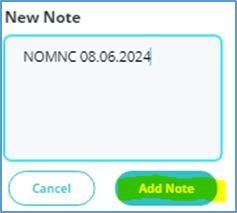
-
Navigate back to the general fields by clicking General.
- Fill out any required fields:
-
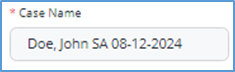
Case Name: client’s last name, first name, type and date of document.
-
Type: select the exact type of document (e.g. Service Agreement or Start of Care
Packet).
- Status: Attached to HCHB
- Security Group: your branch
-
Patient: search for and select client’s name. Never select Create New Patient.
After required fields are completed, click Create in the lower right.
-
-
- With its status saved as Attached to HCHB, the document will now attach to HCHB.
- If the document processed is a Start of Care (Admission) Packet: Continue with process O-14-127 Confirm That Signed Documents Have been Attached.
📅 Effective: 08.27.2024 | 🛠️ Revised: 05.26.2026 | ✅ Approved: JFJ