
O-5-115 Company Mileage - Set Up a New User
👤 RESPONSIBLE POSITION
Manager or Designee
🎯 PURPOSE
The process provides the steps needed to set up an employee as a new user in company mileage, which will enable them to submit expense and mileage reimbursement requests.
🔄 PROCESS
-
After logging into Company Mileage at www.companymileage.com, click Control Panel.
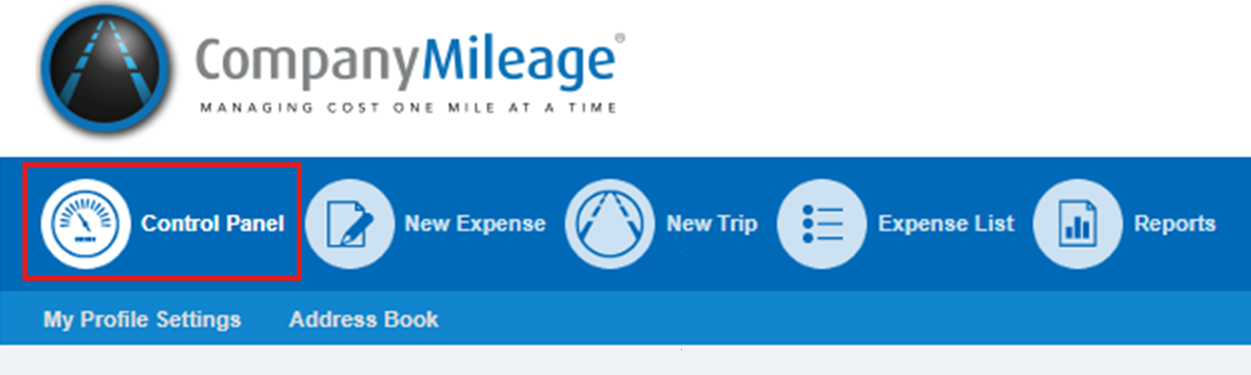
- Then, select System Users.
-
Click Add User.
A new page asking for details of the new user will load. Complete the necessary fields as follows:
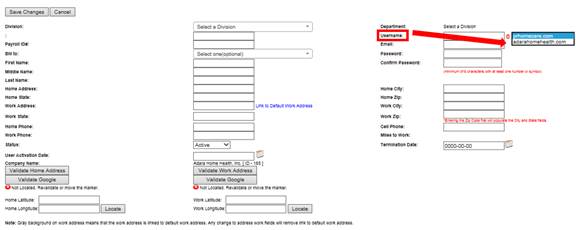
- Division: Choose branch from drop down box.
- Payroll ID: Enter the employee's payroll ID.
- Bill to: Choose branch from drop down box.
- Enter First name and Last name.
- Home Address: Enter the employee's street address.
- Home Zip Code: Enter the zip code; the city and state will automatically populate.
- Work Address: This will automatically populate.
- Telephone Number: Leave blank; you do not need to enter telephone numbers for this system.
- Status: Select Active from drop down box.
- User Activation Date: Enter the employee's hire date.
- At this point, address validation boxes should have automatically turned green. If they don't validate, move the pin around on the map to the correct location.
- Continue with required fields:
- Department: select Hourly or Salary from dropdown box.
- Username: Enter first name.last name@adarshomehealth. This user name must be used even if employee doesn’t have an Adara email.
- Email address: Enter their business email address. If they do not have an Adara email address, enter the personal email provided by the employee.
- Password: Enter a temporary password for the employee to use for the first time they log in. It must be a minimum of 6 characters with 1 number or symbol. (Employee will be prompted to change password at initial log in.)
-
Confirm Password: Re-enter the temporary password.
In the User Administrative Level section, make the following selections in the fields below:

- User: Select this option.
- Allow User to be Imported (ADD Map): Yes
- Allow Trip Entry Screens: Yes
- Allow Expense Entry Screens: Yes
- Additionally, check the following boxes:
- Allow usage of Company Address for Trip Entry
- Allow to add to Personal Address book
- Allow Mobile Access
- Mobile Inactivity Logout
- Select Save.
-
Then, in the Approvals Groups section, click on Go to manage section.

-
A list of Approval Groups appears. Click ‘Assign multiple members’ within the branch the employee is associated with.
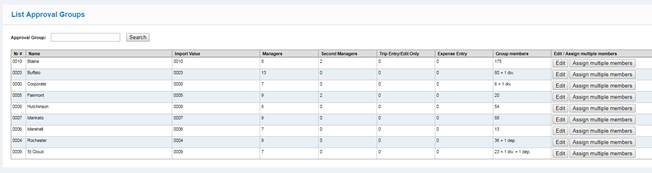
- A screen will load showing all employees for that branch.
- Type the employee's last name in the Search box.
-
Click Search.

- Locate the employee's name and check the box beside it.
- Then, select Group Members.
This completes setup of an employee as a new user in CompanyMileage.
📅 Effective: 02.06.2018 | 🛠️ Revised: 11.13.2026 | ✅ Approved: JFJ