
O-5-135 Set Up a Voicemail Greeting in Zoom Desktop App
👤 RESPONSIBLE POSITION | ROLE
All office employees
Field staff have different instructions and steps needed when setting up their voicemail. For field staff, reference F-5-143 Set Up a Voicemail Greeting in Zoom Mobile App instead of this process.
🎯 PURPOSE
These instructions give the steps for office staff to set up their voicemail greeting in the Zoom desktop application. Every office staff member must have a voicemail greeting set up in Zoom.
This process is for setting up voicemail using the Zoom desktop application. For office staff instructions on setting up voicemails using the mobile application, click here.
🔄 PROCESS
- Open the Zoom application on your computer desktop.
-
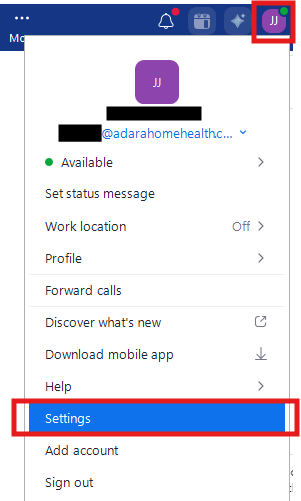
Click on your initials in the upper right and select Settings from the dropdown menu.
-
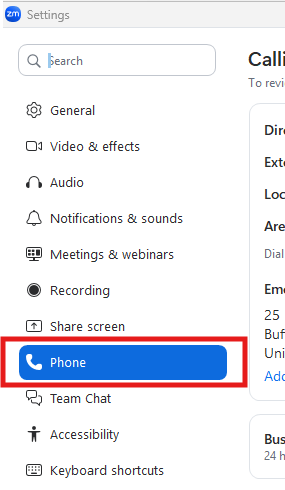
A settings pop-up window will open. Select Phone from the left-hand menu.
-
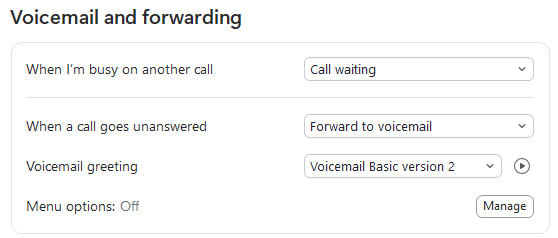
On the right, scroll down to the Voicemail and forwarding section.
-
To listen to your current voicemail, select the play button to the right of the voicemail greeting selection.

-
To set up a new voicemail, click the dropdown and select Add new greeting.
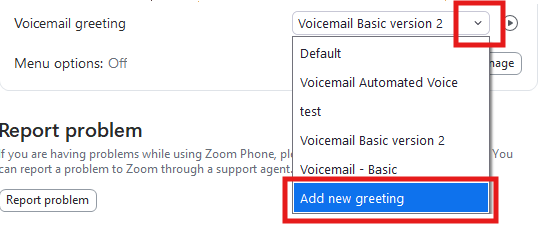
- To change to another voicemail greeting which you previously created, simply select it from the dropdown.
-
After selecting Add new greeting, a pop-up window will open. In the Asset Name field, enter a name for the voicemail greeting.
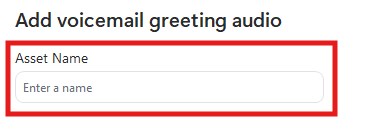
-
There are three voicemail greeting setup options from which you may choose. In the pop-up window, select the option you would like to set up.
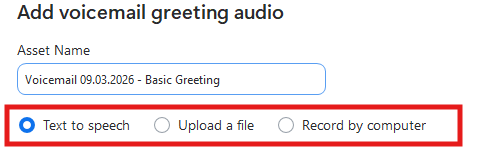
Example: Text to speech is selected as the voicemail greeting type. - Option A: Text to speech
- Option B: Upload a file (not commonly used)
- Option C: Record by computer
- Select your preferred greeting option, as labeled in the blue hyperlink, in step 8 above. The hyperlink will route you to the steps specific to that option below, located in this process's appendix.
- Complete the steps specific to your preferred setup option.
-
After completing these steps, the name of your newly-assigned voicemail name will appear as the selected Voicemail greeting.
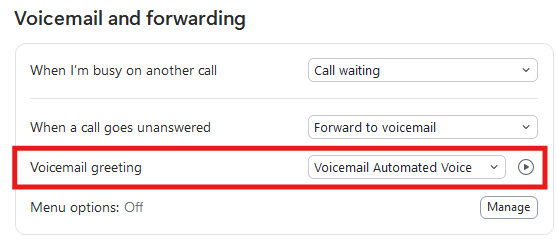
- Changes will save automatically - your new voicemail greeting is now active.
APPENDIX
Option A: Create Voicemail Greeting using Text-to-Speech
An alternative to recording a greeting is to use text-to-speech to have a generated voice read text which you enter. To use this option, having followed the process above through step 8, then complete the following:
-
Select the Text to Speech option.
-
Under Language, select English (United States).
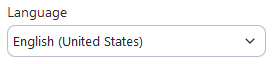
- In the box labeled Message to play, type the full greeting you want callers to hear.
- Sample Voicemail Greeting Script:
-
“You’ve reached the confidential voicemail of [Your Full Name], [Job Title] at Adara Home Health. I’m currently unavailable. Please leave your name, phone number, and a brief message, and I’ll return your call as soon as possible. Thank you.”

-
- Sample Voicemail Greeting Script:
-
Click the Preview button below the text box to hear how the message sounds.

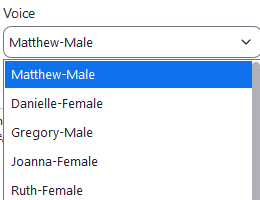
- Under the Voice dropdown above the upper right of the text box, there are different voice styles from which to choose. To preview the different voices, select a name from the dropdown and then click the Preview button to hear the automated voice read your message.
-
You may select a voice which you like, but do not select an option which uses a child's voice.
-
-
Once you're happy with the selections made, the text of the voicemail, and how the preview sounds, select Add in the lower right.
-
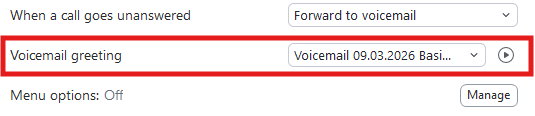
The pop-up window will close and the title of the voicemail you created will now show under the Voicemail greeting selection.
-
As one last step, ensure that the Menu options is listed as Off.

The 'Menu options' selection MUST be OFF. - This completes your voicemail setup. When callers reach your voicemail, they will then now hear that assigned message.
Option B: Upload a Pre-Recorded Voicemail Greeting
To use this option, you will need to upload a pre-recorded .mp3/.wav file.
This option is not commonly used. If you want to use this option, reach out to your Area Manager for direction. If you then proceed with using this option and are experiencing technology barriers, reach out to support@adarahomehealth.com if needed.
Option C: Record your voicemail greeting by computer
Having followed this process through step 8, then complete the following:
-
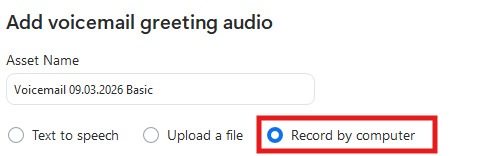
Select the Record by Computer option.
-
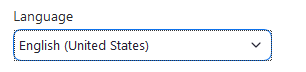
Under Language, select English (United States).
-
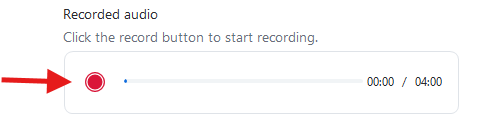
To record your message, select the record button and speak your voicemail greeting.
- Sample Voicemail Greeting Script
- “Hi, you’ve reached the confidential voicemail of [Your Full Name], [Job Title] at Adara Home Health. I’m currently unavailable. Please leave your name, phone number, and a brief message, and I’ll return your call as soon as possible. Thank you.”
- Sample Voicemail Greeting Script
-
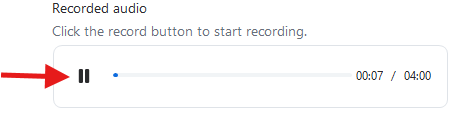
Click the pause button to pause recording.
-
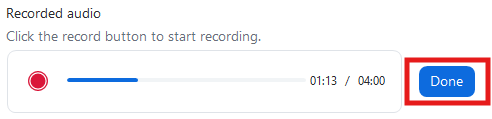
When done recording your message, select Done.
-
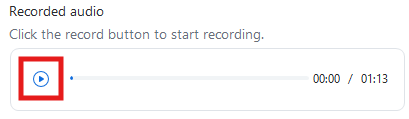
To preview your recording, click the play button.
-
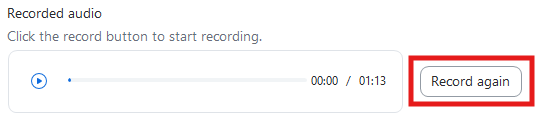
If you wish to re-record, click Record Again (your previous recording will not save).
-
When you are satisfied with your recording, select Add.

-
The pop-up window will close and the title of the voicemail you created will show under the Greeting & Leave voicemail instruction section.
-
As one last step, ensure that the Menu options is listed as Off.
The 'Menu options' selection MUST be OFF. - This completes your voicemail setup. When callers reach your voicemail, they will then now hear that assigned message.
📅 Effective: 03.27.2026 | 🛠️ Revised: 09.08.2026 | ✅ Approved: JFJ